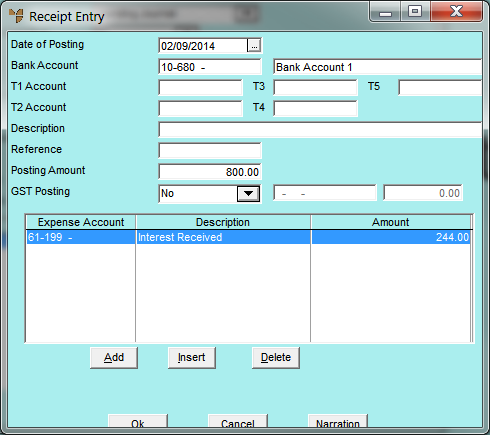
When you enter receipt transactions in a standing journal template, you need to dissect the receipt amounts to the correct revenue accounts in the General Ledger. You do this on the Expense Entry screen.
Refer to "Standing Journal - Receipt Entry".
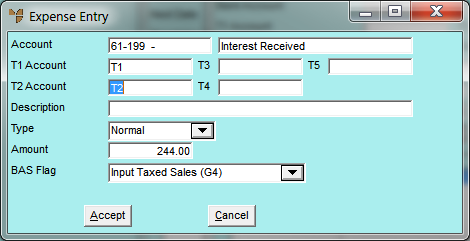
If you selected to add, insert or edit a dissection, Micronet displays the Expense Entry screen.
|
|
Field |
Value |
|
|
Account |
Enter the account to post the receipt transaction to, or press Tab or Enter to select from a list of accounts. |
|
|
T1, T2, T3, T4, T5 Account |
If T accounts are enabled in your system, select a T1, T2, T3, T4 and/or T5 account to be associated with the (credit) revenue posting. If you enter an incorrect account, Micronet displays a list of all available T accounts. |
|
|

|
Technical Tip If T accounts are enabled, you must select them when posting the credit side of receipt transactions. If you don't select a T account, Micronet prompts you to enter one. |
|
|
Description |
Micronet displays the description of the transaction. This can be edited for each account posting to include relevant information relating to that particular GL posting. |
|
|
Amount |
Enter the amount of the receipt entry transaction. If you enter an amount less than the Posting Amount, e.g. to dissect a receipt among various accounts, Micronet displays the remaining unallocated amount of the receipt. Continue to enter receipt accounts until the entire amount is allocated. |
|
|
BAS Flag |
Micronet displays the BAS flag entered against the selected receipt account. However, you can change this if required to process the transaction with an alternative BAS section, e.g. to G14- No GST. |
Micronet saves the dissection and redisplays the Receipt Entry screen showing all dissections for the receipt.